The 8 Best No-Code ETL Tools With Pre-Built Connectors and Live Pipeline Monitoring (2026)
Explore the top no code ETL tools for 2026 and compare connectors, transformations, monitoring, pricing, and best fit use cases.
Jul 27, 2026
A lot of enterprises have built their business on SAP. SAP is a solid foundation, but as the amount of data-hungry applications grows, the transactional nature of SAP can lead to delays. There are also the concerns about who in the organization needs access to the data stored in SAP, such as data analysts and data scientists, and which non-transactional applications shouldn’t be provided access at all.
A more convenient solution is to move the data out of SAP and into a data warehouse. In the on-prem world, this data warehouse can be a SAP product or Teradata/Exadata, etc. With the advent of cloud data warehouses like Google Bigquery, Amazon Redshift, Azure Synapse, and Snowflake, it has become increasingly easy to house this data in multiple ways and places.
The issue then becomes moving data between SAP and your data warehouse or database and keeping everything synched. This article covers how to sync data between SAP and a cloud data warehouse; in this example, we are using Snowflake but any other cloud data warehouse would follow the same procedure.
The journey to a cloud data warehouse can be complex and should be broken down into bite-sized pieces.
Document your answers and use this list to evaluate the level of support for these inputs and outputs in Snowflake. Additionally, use this list as an input to the QA process.
Now that you have an understanding and have documented your current requirements, let’s lay out an execution plan for the data movement.
Instead of an all-at-once approach to syncing, we recommend a phased approach. Move low-impact tables, databases, and applications first before moving on to the complex syncing tasks.
No matter which approach you take, by the end of this step you should have a plan to sync the data.
With your plan of action in hand, let’s get started executing it. Firstly, you’ll want to set up your Hana and Snowflake account to meet your needs.
Use the Snowflake UI/CLI to configure the following on Snowflake:
SAP supports connection via APIs and ODBC/JDBC drivers and you can write code in your favorite programming language and extract data from SAP. When extracting data, it is best if all custom fields are extracted and type information is preserved as type information helps to create tables in Snowflake later. It is best to use a typed format to store this data, so try to avoid CSVs in favor of JSON/AVRO formats.
This step involves creating the Snowflake table for the extracted data. It is best to map SAP field types to Snowflake field types. Having a typed format in Step 4 makes this really easy, though you may still need to rename columns not adhering to the Snowflake column naming conventions
Use the snowflake COPY command to bulk load the files created in Step 4 into Snowflake.
Integrate a scheduler (Quartz, Airflow, etc) to run steps 1-6 on the desired frequency.
Now that your data has been successfully loaded into Snowflake, you may be wondering about optimizing the process. How can you save time and automate this? What if you could update only things that had been changed, or make it easier for more applications to access SAP?
One solution is using deltas to load in data. You can snapshot data once from SAP and load it into Snowflake so you only have to load deltas going forward. This does require you to remember the last loaded row from SAP Hana, though; simply follow step 6 of this guide again with the new data.
Providing access to SAP can be a reason to hesitate, but providing access to Snowflake is much easier. You can build APIs to Snowflake to provide access to other applications or share tables with them.
![]()
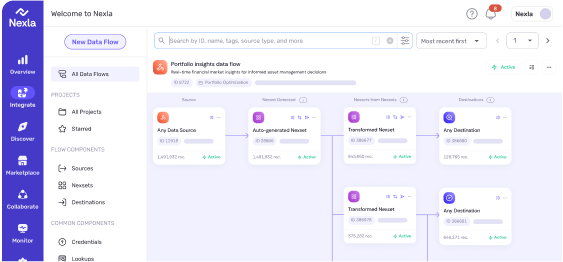
Naturally, there are tools to automate and improve the process. Nexla makes it easy to perform all these steps in a few clicks. Simply add your credentials to connect to SAP/Snowflake, select your tables, and you’re done. Some Nexla customers have synced data between SAP Hana and Snowflake in less than 10 minutes.
To learn more about how Nexla can save you time and accelerate your time-to-value, request a free demo today!
Explore the top no code ETL tools for 2026 and compare connectors, transformations, monitoring, pricing, and best fit use cases.
Learn how to build a production AI agent data feed with multiple sources, automated governance, and MCP in hours instead of weeks.
The 10 best data integration tools of 2026, ranked on connector breadth, CDC latency, pricing behavior at scale, and AI readiness, with an interactive selector, the ownership map after four acquisitions, and the pricing traps most lists miss.