CI (Continuous Integration) has enabled software engineering teams to collaborate better and leverage automation. Alongside CD (Continuous Delivery/Deployment), this process enables a much higher clearer and faster time to production in the software development process.
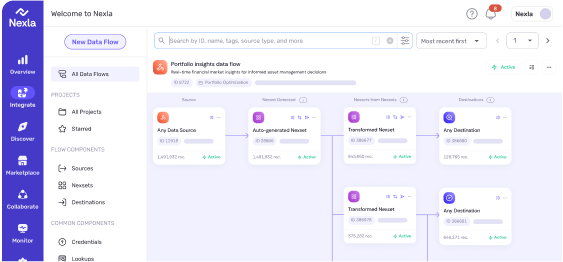
As you start to use Nexla, you may end-up with multiple data pipelines at various stages of operationalization. Tracking the various states of those flows and what is in production or development is simple with Nexla’s flow tags and instant promotion to your CI server.
The Nexla Solution
For any CI server, Nexla has built-in functionality to promote any flow to production, create a clone of it, and easily rename and tag flows. Coupled with powerful data flow searching, managing many pipelines in various stages of development and testing is a breeze.
With Nexla, tracking and viewing data pipelines and their production status is easy, and promoting production-ready dataflows to your CI server is simple. In this tutorial, we’ll be taking a sample Development dataflow in Nexla, and promoting to production on a Jenkins CI server. If engineers then want to make tweaks to credentials, datasets used, or anything else, it’s straightforward to tweak the cloned dataflow and keep track as Nexla visualizes and organizes dataflows.
Watch the demo in a short video, or read on for the steps written out.
1. Create the Development Dataflow
First, we’ll show the creation of the dataflow that we want integrated to our CI server. In this demo, I’ll be creating a dataflow that reads data from Google Drive, applies some transformations, and sends it over to my partner’s Dropbox. That’s the dataflow I want promoted to Jenkins and cloned.
I’ll add my Google Drive information as a source, and then Nexla will auto-detect a Nexset from that source. I’ll make sure to tag that Nexset as Development. The process is exactly the same for any of Nexla’s hundreds of connectors, so don’t worry about the specific source or destination.
*This process is exactly the same for any of Nexla’s hundreds of connectors, so don’t worry about the specific source or destination.
Once the Nexset is created, I can add Dropbox as a destination in a similar way. Now the dataflow is complete and data is flowing.
2. Copy the Destination ID into Jenkins
Now that the flow is complete, I can copy the destination ID into Jenkins using Build with Parameters. That’s all I need along with my Nexla API credentials to create the production-ready flow in Nexla.
3. Production Dataflow is Created
When you return to your Nexla dashboard, the production dataflow copy should be created in minutes. Now I can tag that as the most recent Production flow, and then make any changes needed to the Dev or Prod flow.
When I tag the flows as Dev or Prod, it’s easy to search by tags and check at-a-glance for all flows you’re looking for.
This is one example of Nexla’s powerful data flow setup that makes it easy for anyone to integrate, prepare, and monitor data from any source, without advanced technical skills. Enabling engineers to test and tweak dataflows instantaneously with pipeline promotion in the places they already work saves huge amounts of time and confusion. For example, now an engineer can check the CI server output, make any tweaks to the Dev flow, and promote again to production in Nexla following the same steps in minutes rather than hours.
Data Platform for AI Agents: 7 Capabilities to Demand
A data platform for AI agents must do 7 things: connect, abstract, govern, deliver, act, observe, secure. Use this checklist to evaluate any vendor or stack.
How to Give AI Agents Access to Enterprise Data (Without Rebuilding Your Stack)
Give AI agents secure access to enterprise data without rebuilding your stack. Compare DIY vs. managed paths, see a 1-week vs. 12-week timeline, pick what fits.
Agentic RAG: How AI Agents Reason Over Enterprise Data
Agentic RAG replaces static retrieval with planning, tool use, and reflection. See the architecture, when to choose it over RAG, and metrics that actually matter.